3 Ways to Remove Mould on Walls and Ceilings Before Painting
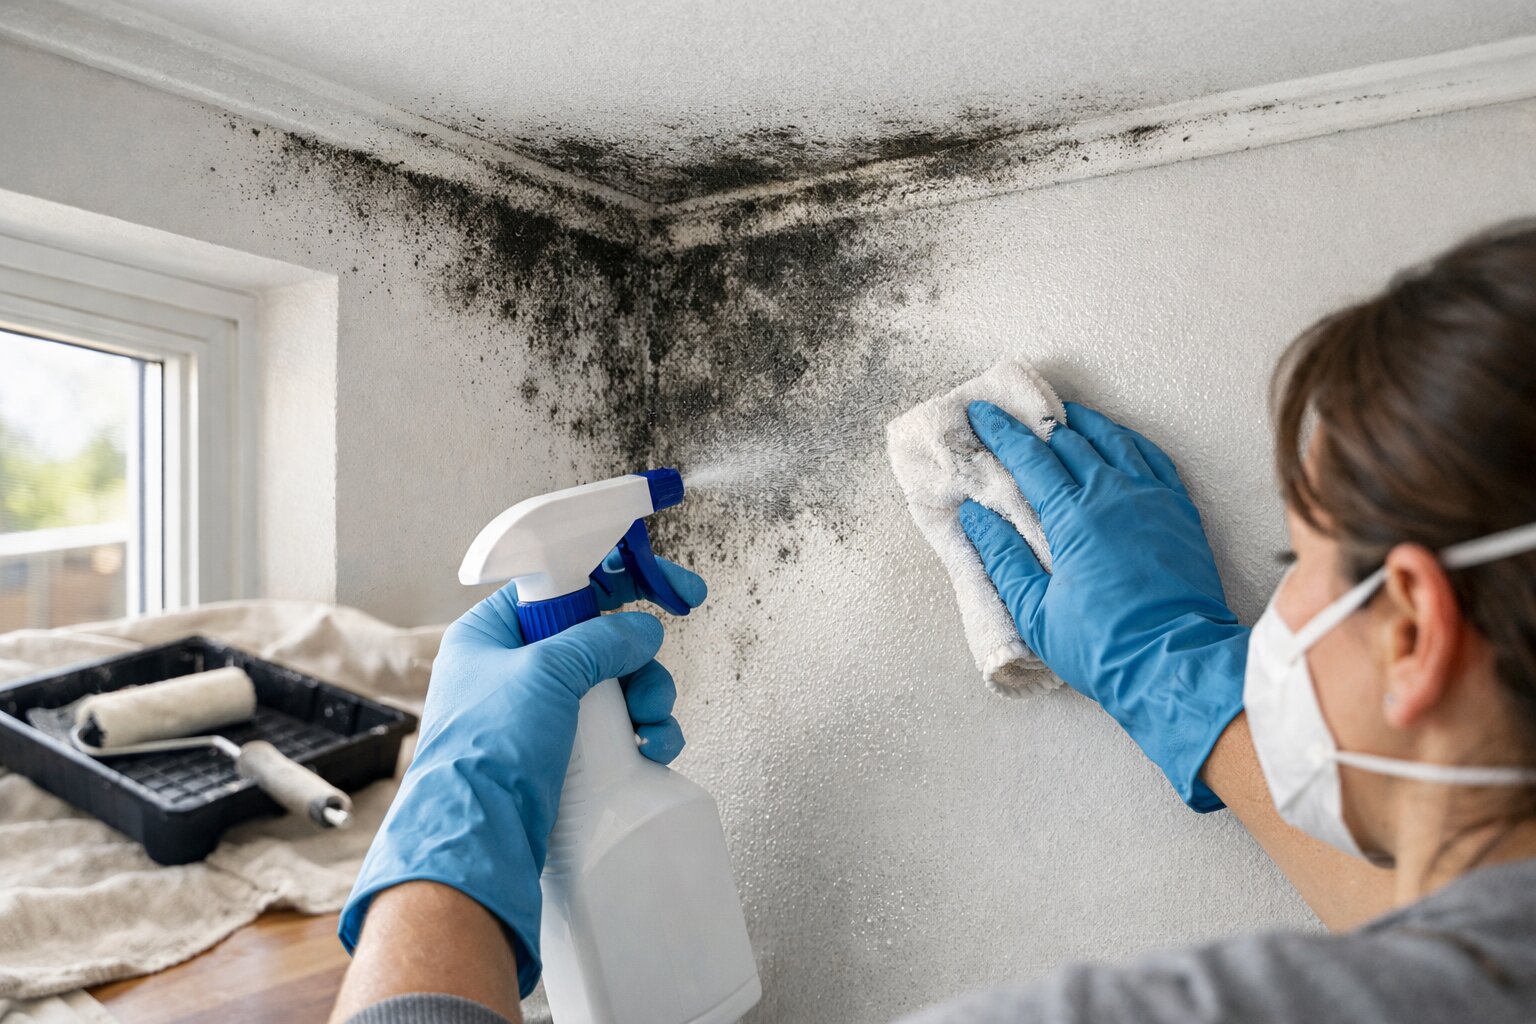
Table Of Content
- Introduction
- Why You Must Remove Mould Before Painting
- What Causes Mould on Walls and Ceilings?
- 3 Best Ways to Remove Mould Before Painting
- How to Prepare the Surface for Fresh Paint
- How to Stop Mould from Coming Back After Painting
- Common Mistakes to Avoid
- Final Thoughts
To remove mould from walls and ceilings before painting, first fix the moisture source, then clean the affected area using white vinegar, diluted bleach for non-porous surfaces, or a mould remover spray. Once the surface is fully dry, apply a mould-resistant primer before repainting. Many professional painters follow this process to ensure a durable, high-quality finish.
There is nothing quite as satisfying as a fresh coat of paint to breathe new life into a room. However, if you have noticed dark, unsightly spots creeping across your plasterwork, you have a problem that a simple coat of paint cannot fix alone. Proper paint preparation is the foundation of any successful DIY or professional decorating project, and dealing with fungal growth is the most critical step.
Whether you are upgrading a steamy bathroom, refreshing a damp basement, or dealing with the aftermath of a roof leak, this comprehensive guide will walk you through the exact methods to eradicate fungal growth and execute flawless wall prep, just like professional painters do.
Why You Must Remove Mould Before Painting
When you are eager to get a decorating project finished, it can be tempting to just roll a thick layer of paint over those ugly black and green spots. However, dealing with mould before painting is an absolute necessity, not just a recommendation.
Painting over mould without treating it first usually leads to peeling paint and recurring black spots within weeks.
Here is a deeper look at exactly why you must tackle ceiling mould removal and wall cleaning before opening your paint tins:
- Paint Won’t Adhere Properly: Paint requires a clean, dry, and smooth surface to bond effectively. Mould creates a slimy, textured film on your walls. If you paint over it, the paint is clinging to the fungus rather than the wall, leading directly to adhesion failure.
- Mould Grows Under Paint: Fungal spores are living organisms. Standard household emulsions and latex paints contain organic compounds that can actually feed the spores. The fungus will continue to grow and spread beneath the fresh coat of paint.
- Stains Bleed Through: Even if you apply multiple coats of high-opacity paint, the dark pigments of the spores will eventually bleed through the surface, leaving you with yellowish-brown or black stains ruining your pristine finish.
- Peeling and Bubbling Issues: As the fungus continues to thrive and trap moisture beneath the new layer of paint, it creates hydrostatic pressure. This causes your fresh paint to blister, bubble, and eventually peel away in large flakes.
- Health Concerns from Spores: Covering the problem cosmetically does not solve the environmental hazard. Active spores can still impact your indoor air quality, leading to respiratory issues, allergic reactions, and asthma flare-ups.
- Mould Returns Quickly if Painted Over: Without proper fresh paint preparation, the cosmetic fix will be incredibly short-lived. The dark patches will inevitably push their way back to the surface, meaning all your hard work and expensive materials will have been wasted.
What Causes Mould on Walls and Ceilings?
Before you begin scrubbing, it is vital to understand why the problem occurred in the first place. Fungal growth requires three things to thrive: oxygen, a food source (like drywall, wood, or dust), and moisture.
If you do not eliminate the root cause of the moisture, the dark spots will return. The most common culprits include:
- Bathroom Steam: Hot showers create dense steam. Without an extraction fan, this steam settles on the ceiling and upper walls, creating the perfect damp environment for spores to multiply.
- Roof Leaks: A slow, hidden leak in your roof can allow water to seep into your ceiling cavities and saturate the plasterboard from the inside out.
- Condensation: In winter, warm indoor air collides with cold external walls and single-glazed windows. The resulting condensation leaves walls perpetually damp.
- Poor Ventilation: Rooms that remain closed up with stagnant air do not allow natural moisture from breathing, cooking, and daily living to evaporate.
- AC Leakage: Air conditioning units produce condensation. If the drip pans overflow or the lines become blocked, water can easily seep into surrounding drywall.
- Humid Rooms: Basements, kitchens, and homes in tropical or high-humidity climates naturally carry more moisture in the air.
- Laundry Areas: Tumble dryers that are not vented to the outside, or simply hanging wet clothes on radiators, release litres of water vapour directly into your home’s air.
Surface Mould vs Deeper Moisture Damage
When assessing your walls, you must determine whether you are dealing with superficial cosmetic issues or structural damage.
Surface mould is typically caused by condensation and poor ventilation. It appears as a light dusting or spotty patches on the outermost layer of the paint. It usually wipes away relatively easily and does not compromise the wall's integrity.
Deeper moisture damage is usually the result of a leak (plumbing or roofing). If the drywall feels soft, spongy, or crumbly to the touch, or if there is a strong musty odour emanating from inside the wall cavity, surface cleaning will not be enough. In these cases, the affected drywall must be cut out and replaced before any painting can occur.
3 Best Ways to Remove Mould Before Painting
Once you have identified and fixed the source of the moisture, you can begin the eradication process. Make sure the room is well-ventilated by opening windows, and always wear protective gear—including rubber gloves, safety goggles, and an N95 respirator mask—to prevent inhaling disturbed spores.
Here are the three most effective methods for clearing your surfaces.
Method 1: White Vinegar (Best for Painted Walls)
White vinegar is a mild, natural acid that is incredibly effective at killing fungal spores. In fact, research shows it can kill up to 82% of known mould species. Because vinegar is highly penetrative, it can soak into porous materials to kill the roots of the fungus, making it the superior choice for most interior walls.
What you will need:
- A clean spray bottle
- Undiluted standard white vinegar (usually 5% acetic acid)
- Microfiber cloths or a soft-bristled scrubbing brush
The Steps:
- Pour the undiluted white vinegar directly into the spray bottle.
- Spray the affected wall or ceiling generously until the area is thoroughly saturated.
- Leave for 1 hour. This dwell time is crucial as it allows the acetic acid to penetrate the surface and kill the root system of the spores.
- Wipe the area clean using a damp microfiber cloth. If there is a slight stain left behind, lightly scrub the area with a soft brush.
- Allow the surface to dry fully before moving on to your fresh paint preparation.
Best for:
- Plaster walls
- Painted ceilings
- Bedrooms
- Bathrooms
Pro Tip:
For highly stubborn or heavily established mould spots, spray the vinegar and leave it overnight. The extended exposure ensures the roots are completely eradicated before you begin wiping the walls down the next day.
Method 2: Diluted Bleach Solution (Best for Non-Porous Surfaces)
Bleach is a powerful chemical that rapidly destroys surface fungus and removes dark stains. However, there is a very important caveat to using it.
Use bleach only on non-porous surfaces such as tiles, glass, and sealed surfaces.
Why? Bleach is primarily composed of water. When applied to a porous surface like plasterboard or drywall, the chlorine sits on the surface while the water soaks deep into the material. This water actually feeds the surviving roots, causing the fungus to return stronger than before. Therefore, reserve this method strictly for non-porous trims, glass, or high-gloss sealed surfaces.
The Ratio:
- Mix 1 cup of bleach to 4 litres of water.
The Steps:
- Mix the diluted bleach solution in a bucket.
- Dip a sponge or stiff brush into the mixture and apply it to the non-porous surface.
- Scrub the spots away. The stains should vanish almost immediately.
- Rinse the area thoroughly with clean water to remove chemical residue.
- Dry the surface with a towel.
Never mix bleach with vinegar as it creates toxic fumes.
This combination creates chlorine gas, which is highly dangerous and can cause severe chemical burns to your respiratory system. Always use one method or the other, and thoroughly wash tools between uses.
Method 3: Commercial Anti-Mould Spray
If you want a targeted, fast-acting solution formulated specifically for DIY decorating, a commercial mould remover spray is an excellent choice. Available at almost all hardware and home improvement stores, these products take the guesswork out of chemical mixing.
Why choose a commercial spray?
- Easy application: They come ready-to-use in convenient trigger bottles.
- Fast acting: Many commercial formulas dissolve spores and bleach stains in a matter of minutes.
- Ideal for stubborn spots: Specialized formulas often contain surfactants that help the active ingredients cling to ceilings and vertical walls without dripping.
When shopping, look for products labelled as an anti fungal cleaner or a mould killer for walls. Be sure to read the packaging carefully, as some are formulated specifically for bathrooms, while others are designed to prepare drywall for painting. Always follow the manufacturer’s label instructions regarding application times and whether the product requires rinsing before painting.
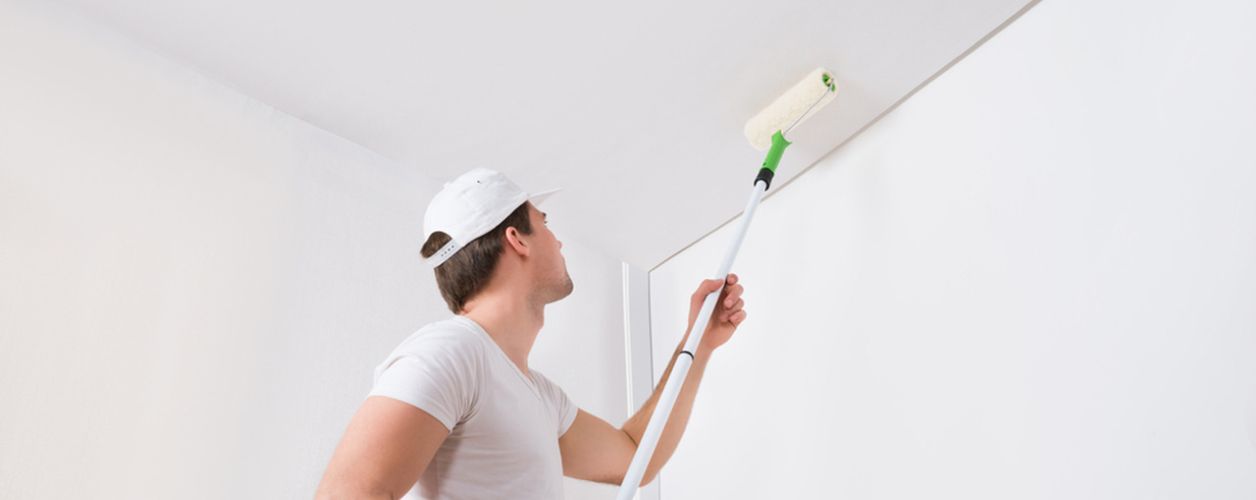
How to Prepare the Surface for Fresh Paint
Successfully cleaning the wall is only the first half of the battle. If you want a flawless, long-lasting finish, you must execute proper wall prep. Rushing this stage is a guaranteed way to ruin your hard work.
Here is the step-by-step paint preparation process following fungal removal:
Let the Surface Dry Completely
Moisture is the enemy of fresh paint. After treating the wall with vinegar, bleach, or an anti fungal cleaner, you must allow the wall to dry completely. Wait a minimum of 24 hours before opening your paint tins. Pointing a fan at the wall or running a dehumidifier in the room will help speed up the evaporation process.
Sand Any Peeling Paint
Moisture damage often causes the old paint to flake or bubble. Once the wall is dry and 100% free of active spores, take a medium-to-fine grit sandpaper (around 120-grit) and gently sand away any peeling or blistering paint. Light sanding only is required to smooth the edges between the bare plaster and the remaining intact paint. Wipe away the sanding dust with a slightly damp cloth.
Apply Mould-Resistant Primer
Do not skip this step. Applying an anti mould primer is the ultimate insurance policy for your walls. These primers (often stain-blocking and shellac-based or synthetic) seal the porous surface, lock in any remaining micro-stains so they do not bleed through, and contain mildewcides that actively prevent future fungal growth.
Use Moisture-Resistant Interior Paint
Once the primer is dry, finish the job with the correct topcoat. For high-humidity areas, standard flat or matte emulsion will simply absorb moisture. Instead, use a moisture-resistant interior paint with a satin or semi-gloss finish. These paints create a hard, washable shell that repels condensation, making them highly recommended for steamy bathrooms and busy kitchens.
How to Stop Mould from Coming Back After Painting
You have cleaned the walls, prepped the surface, and applied a beautiful fresh coat of paint. To protect your investment and maintain a healthy home environment, you must adopt preventative habits. Fungi will not grow where there is no trapped moisture.
- Improve Airflow: Keep interior doors open when possible to allow air to circulate freely throughout the house. Stagnant air pockets in corners are prime real estate for spores.
- Use Exhaust Fans: Always use an extractor fan when showering or cooking. Crucially, leave the fan running for at least 20 to 30 minutes after you have finished to fully extract residual steam.
- Open Windows: Make it a daily habit to cross-ventilate your home. Opening windows at opposite ends of the house for just 15 minutes a day flushes out damp, stale air.
- Use a Dehumidifier: If you live in a damp climate or have a basement room, run a dehumidifier. Aim to keep indoor relative humidity below 50%.
- Fix Leaks Promptly: At the first sign of a dripping pipe, overflowing gutter, or missing roof tile, get it repaired. Small leaks escalate into massive fungal problems rapidly.
- Avoid Indoor Drying: Try not to dry laundry on indoor radiators. If you must dry clothes indoors, do it in a room with a cracked window, an exhaust fan, or a dehumidifier running.
- Use Anti-Mould Paint: When you decorate, consistently choose paints with built-in mildewcides for high-risk zones.
Common Mistakes to Avoid
Even well-meaning DIYers can trip up when dealing with mould before painting. Keep these common pitfalls in mind to ensure your project is a success:
- Painting directly over mould: As discussed, this merely hides the problem temporarily while allowing the fungus to eat away at your new paint from the inside out.
- Not fixing the moisture issue: Cleaning the wall is futile if the leaky roof or broken exhaust fan is still dumping moisture into the room.
- Using bleach on porous walls: Bleach on drywall or plaster feeds the fungal roots with water, causing it to return with a vengeance.
- Repainting before drying: Trapping moisture under fresh paint by painting too soon will cause immediate bubbling and blistering.
- Skipping primer: Skipping an anti mould primer allows old stains to bleed through the new topcoat, ruining the aesthetic finish.
Final Thoughts
Removing mould properly before painting helps your new paint last longer, prevents stains from returning, and creates a healthier indoor space.
Taking the time to effectively kill spores, dry the plaster, and prime the walls requires a little extra patience, but the results are undeniably worth it. By following the methods outlined above, your freshly painted ceilings and walls will remain bright, clean, and entirely fungus-free for years to come.


Answers to Your Common Questions
No, mould should always be removed first or it will grow through the new paint layer. Fungal spores are living organisms that can feed on the organic compounds in standard interior paints, causing your new coat of paint to peel, bubble, and stain very quickly.
Yes, vinegar is usually better for painted and porous surfaces. Because white vinegar is mildly acidic, it can penetrate the porous structure of drywall, plaster, and wood to kill the root of the fungus. Bleach merely sits on the surface, making it suitable only for non-porous materials like glass and tile.
You should wait at least 24 hours after the surface is fully dry. It is vital that all moisture from the cleaning process (whether you used vinegar, bleach, or a commercial spray) has completely evaporated. Painting over a damp wall traps moisture and leads to peeling.
To prevent future growth, use a high-quality mould-resistant primer followed by an anti-mould interior paint. These products contain specific mildewcides and fungicides designed to repel moisture and prevent spores from settling and taking root on the surface.
Usually because the moisture source has not been fixed. If you clean the wall but continue to take hot showers without proper ventilation, or if a slow plumbing leak continues behind the drywall, the damp environment will consistently invite new spores to grow, regardless of your paint job.
Yes, especially if the mould covers a large area (typically anything larger than 1 square metre), keeps recurring despite your best cleaning efforts, or if the drywall feels soft and structurally compromised. A professional can safely remediate extensive damage and ensure your home is structurally sound before repainting.
YOU MIGHT ALSO BE INTERESTED IN