How to Install Shelves? - Easy Handyman Tips
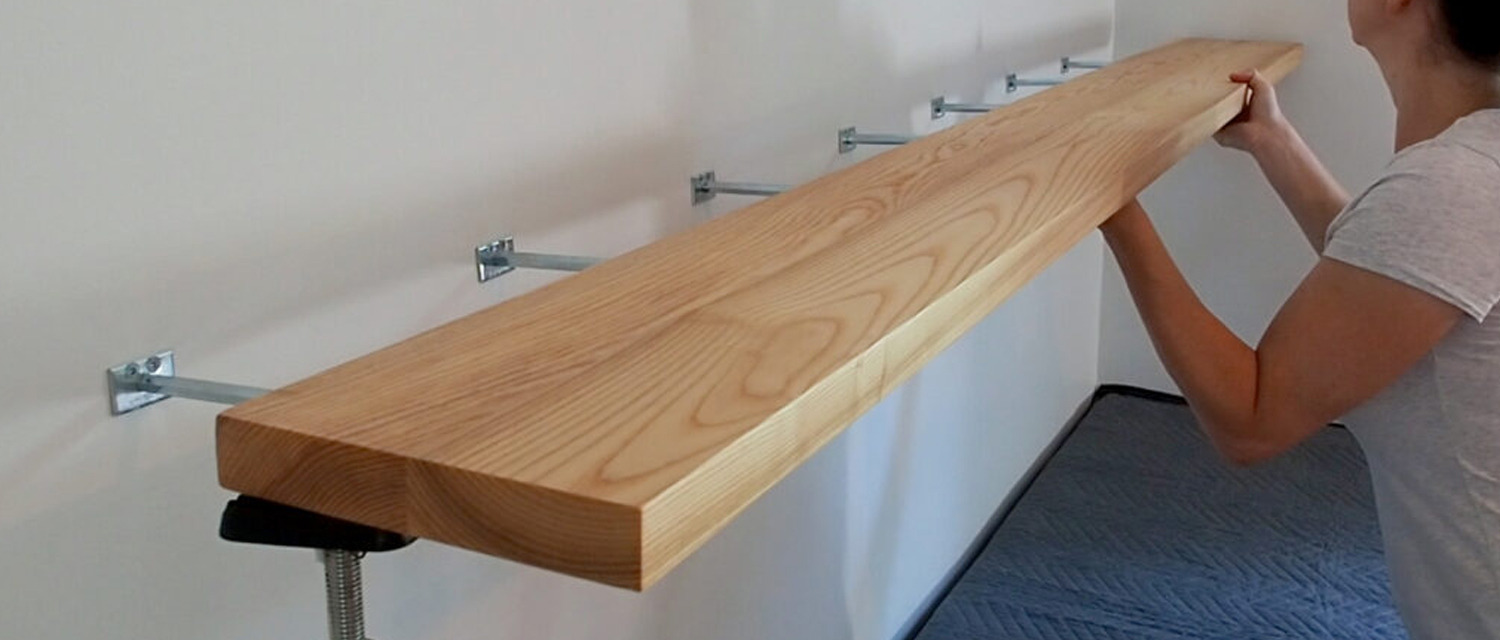
Table Of Content
- Introduction
- Understanding Wall-Mounted Shelves
- Essential Tools And Materials For Installing Shelves
- How To Install Shelves?
- Conclusion
With Shelves, you can transform your living space into a new environment for valuable storage and display areas. Whether you are organizing your closet, expanding in your kitchen or making a stylish display for the living room, the important thing is how well shelves have been installed onto walls, because it should be functional and look visually beautiful. Read about how to install shelves – a handyman guide will help you do this like pros.
Understanding Wall-Mounted Shelves
Numerous wall-mounted shelves could potentially be used. Here, we will talk about some of the most used options and their benefits.
Types of Wall-Mounted Shelves
Different styles of wall-mounted shelving systems include:
- Bracket and standard systems
- Floating shelves
- Track-based shelves
- Built-in shelving units
- Wood planks and shelves
- Decorative shelf brackets
Advantages of Wall-Mounted Shelves
- Space friending: Because they're wall-mounted, frames can save you some valuable floor space- a great idea for anyone living in cramped quarters.
- Adjustable: You can change the height and placement of your shelves to suit you.
- Versatile: They are well suited for any room such as kitchens and bedrooms.
- Inexpensive: Wall-mounted shelves are a cost-effective choice for those who want shelf space.
- Easy Installation: Many homeowners can install their systems with only a few tools and instructions.
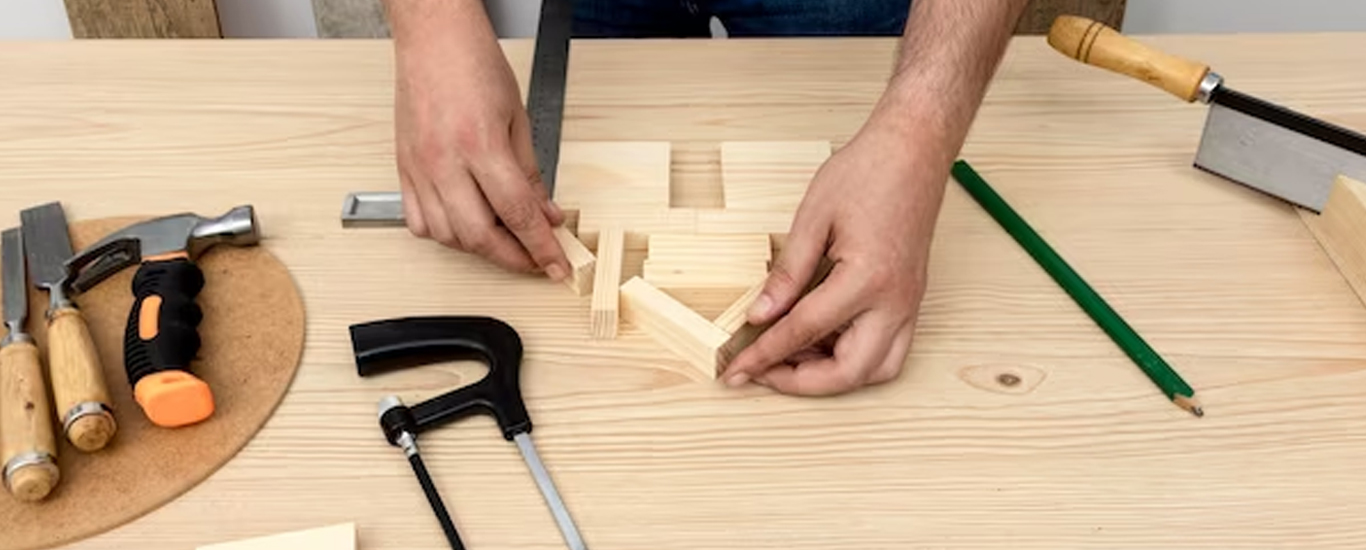
Essential Tools And Materials For Installing Shelves
- Shelves and Brackets: Select shelves that fit the style of mounts you choose as well as are sturdy enough for your weight requirements. The way you decorate is going to be different for floating shelves, bracketed shelving and wall-mounted units.
- Tape Measure: It is of utmost importance to take actual measurements while installing shelves with proper levels and spaces between brackets.
- Level: The foundation of your shelves is set in a level reveal which keeps all straight and without wobbling or a drunken tilt.
- Power Drill and Bits: The first step in making ear weights is drilling holes, so you will need a power drill. If you are going into any type of wall ensure your drill bits match the properties of that specific wall.
- Screwdriver: You will require both flathead and Phillips (1 of each) to make sure your brackets and shelves are secure.
- Anchors and screws: Use wall anchors if you aren’t drilling into studs. Choose screws which are appropriate to be able to withstand the weight of your shelf and wall material.
- Pencil: It is used on the wall to mark (measurement & placement).
- Stud Finder: This helps you locate wall studs in your walls so that you can attach the screws to a solid anchor point instead of just drywall.
- Level tool: Before drilling, make sure your shelf is level (the built-in LeveLine Tool keeps everything straight and narrow).
- Safety Wear: Many sharp things could hurt you while installing it, so safety goggles and gloves would be a great investment.
How To Install Shelves?
1. Choose the Right Shelf Type
Choose the type of shelf that suits you best. Floating shelves give a nice, contemporary look but are hard to install correctly. Bracket shelves have a more old-school look and can support heavier weights. Wall-mounted shelving is great for heavy things, but it can be more of a pain to install.
2. Measure and Plan
- Determine Location: Decide which location you would like shelves to be placed. Remember to consider their height, spacing and design too so they fit in perfectly.
Use a measuring tape to measure and mark where you want the shelves. If you are installing a wider shelf, measure the width and have that space uniform between each shelf.
3. Locate and Mark Studs
- Use a stud finder: To locate the studs in your wall, when you are installing heavy-duty shelves then use a stud finder. Studs are the best location for anchor points.
- Measuring stud lines from the centre of sets: Mark them now using a pencil.
- Wall Anchors: For floating shelves or drywall installs, lay out where you want the shelf to sit so that wall anchors can be installed.
4. Install Brackets or Supports
For Bracketed Shelves:
- Mark: Line up those brackets with the marks you made. Check their evenness with a level as well.
- Drill Holes – simply drill holes through the wall where you marked. When drilling as close to studs drill with a screw that fits the size of your 2 x material that is applicable for stud spacing (Your screws need to be long but not too stupidly long). Use wall anchors if drilling into drywall.
- Screws and Brackets: Level the brackets, using screws to secure them firmly in place.
For Floating Shelves:
- Install Brackets - Floating shelves are typically mounted through hidden brackets or supports to be installed inside the wall. To use these supports, follow the manufacturer's instructions for their installation.
- Add Wall Anchors: This would provide additional support to the shelves, if not screwing into studs.
- Align: Put your shelf in place, fitting it onto the brackets or supports and levelling.
- Secure: For floating shelves, screw straight through the shelf and into hidden brackets. Spent 40 minutes working on the bottom wobbly shelf to make sure it is securely seated and even screwed in more screws into bracketed shelves.
5. Mount the Shelves
6. Check for Level
If your shelves have slippage, they also may be uneven and a levelling tool will help you ensure that they are perfectly horizontal. Fine-tune as necessary steps until you do the final install.
7. Finish Up
- Solid Screws: Tighten all the screws tightly and make sure that the shelves are stable.
- Wipe off: Wipe away any pencil marks where you put the holes, and clean up any sawdust or drywall debris generated from making your holes.
Additional Tips For Shelf Installation
- What About Weight: Brackets and shelves have a weight capacity that’s why always check it first. Overloading shelves can become unstable and pose a severe risk.
- Wall material: Drywall, plaster and brick, all need different styles of anchors to hold screws. Be sure to use appropriate hardware depending on the type of wall you are hanging into.
- Safety first: Use protective eyewear and gloves when drilling or using tools.
Conclusion
Apply the above steps and tips to install shelves that are aesthetically pleasing as well as practical for your use. Regardless of whether you are an experienced handyman or a DIY enthusiast, this guide will help in your shelf installation project. By using your tools and by doing the right planning, it is an easy DIY project to install shelves on a wall.
Taking these simple handyman tips into account, from choosing the right type of wall anchors for your walls and always checking to make sure things are level when hanging shelves (using a quick line or level) as well as double-checking measurements can help ensure you get it done correctly in one pass!
Whether you need to get everything out of the way so you have a tiny bit more room for your essentials or want an Instagram-worthy overflow, these handy tips will help make sure that the job gets done as quickly and smoothly as possible.
YOU MIGHT ALSO BE INTERESTED IN