Best Verandah Installation Guide and Options in Australia
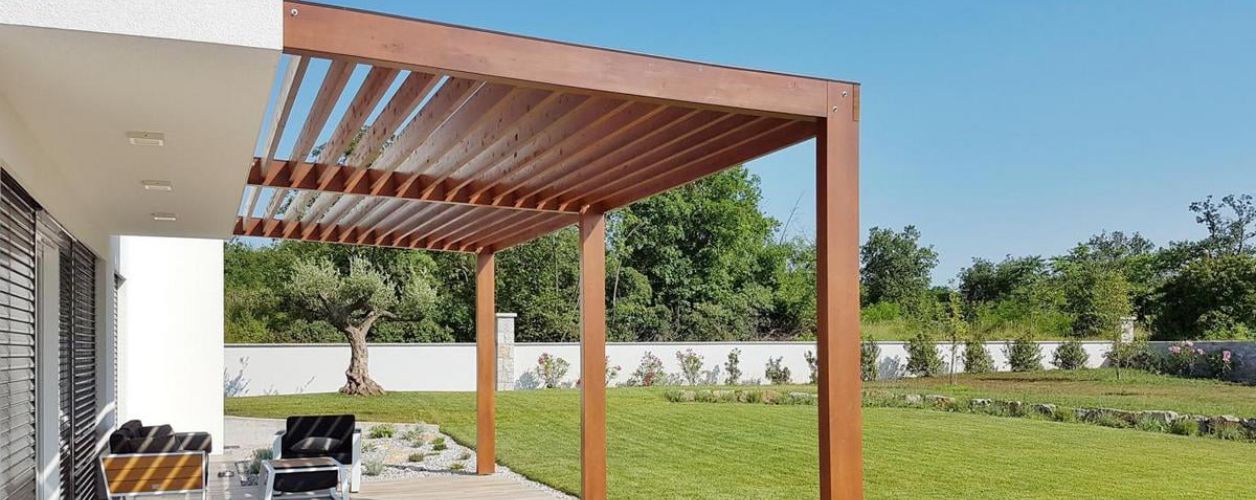
Table of Contents
- Best Verandah Materials in Australia
- Verandah Design Options Popular in Australia
- Comparing Attached vs Freestanding Verandah
- Step-by-Step Verandah Installation Guide
- DIY Installation vs Professional Installation
- Typical Labour Costs for
- Maintenance Tips to Keep Your Verandah Looking New
- How to Hire the Best Verandah Builder
Verandah Installation And Options In Australia
Adding a verandah to your home isn’t just a makeover, it’s an instant lifestyle upgrade.
In Australia, where outdoor living is a way of life, a verandah becomes the perfect hangout zone for morning coffees, lazy Sunday reads, BBQ nights, or simply escaping the summer sun without melting like an ice block on the pavement.
But here’s the catch: picking the right verandah style, materials, builder, and installation approach can feel like decoding ancient hieroglyphics. Costs vary, council rules sneak in, and every builder claims to be “the best in town.” This guide cuts through the noise and provides a clear and practical breakdown of everything you need to know before installing a verandah in Australia.
Best Verandah Materials in Australia
Choosing the right verandah material is basically choosing how much stress you want in the future. Here’s the full breakdown.
Timber Verandahs
Pros:
- Beautiful, warm, classic Aussie aesthetic
- Works great with heritage homes
- Easy to customise or repaint
Cons:
- Needs regular maintenance (painting, staining)
- Can warp, rot, or attract termites in humid areas
- Not ideal for bushfire zones unless BAL-rated hardwood
Aluminium Verandahs
Pros:
- Super low maintenance
- Rust-proof and perfect for coastal areas
- Lightweight and long-lasting
- Great for DIY kits
Cons:
- Not as “premium” looking as timber or steel
- Limited colours compared to Colorbond
Colorbond Verandahs
Pros:
- Iconic Aussie roofing option with huge colour range
- Great heat reflection
- Excellent durability and bushfire compliant
Cons:
- It can be noisy during heavy rain
- Needs proper insulation in hot climates
Steel Frame Verandahs
Pros:
- Extremely strong and long-lasting
- Ideal for large/heavy roof designs
- Perfect for bushfire-prone zones
Cons:
- Can rust without proper galvanising
- More expensive than aluminium and needs pro installation
Polycarbonate & Glass Roofing
- Polycarbonate: Lets in natural light and is UV-protected, but can discolour over time.
- Glass: Luxurious and modern, but expensive and requires precise installation.
What Works Best in Each State?
| State | Recommended Materials & Design |
|---|---|
| VIC | Colorbond, steel frames, insulated roofing. |
| NSW | Colorbond, aluminium near beaches, polycarbonate for light. |
| QLD | Aluminium, polycarbonate, insulated panels for heat. |
| WA | Aluminium for coastal areas, steel for inland wind-prone zones. |
| SA | Colorbond and steel frames for hot & dry climates. |
| TAS | Timber or insulated steel to handle colder conditions. |
Verandah Design Options Popular in Australia
Australia has no “one verandah fits all” situation. Here are the most popular options:
Flat Roof Verandahs
The minimalist, clean, modern favourite. Best for small spaces, modern homes, and budget-conscious builds.
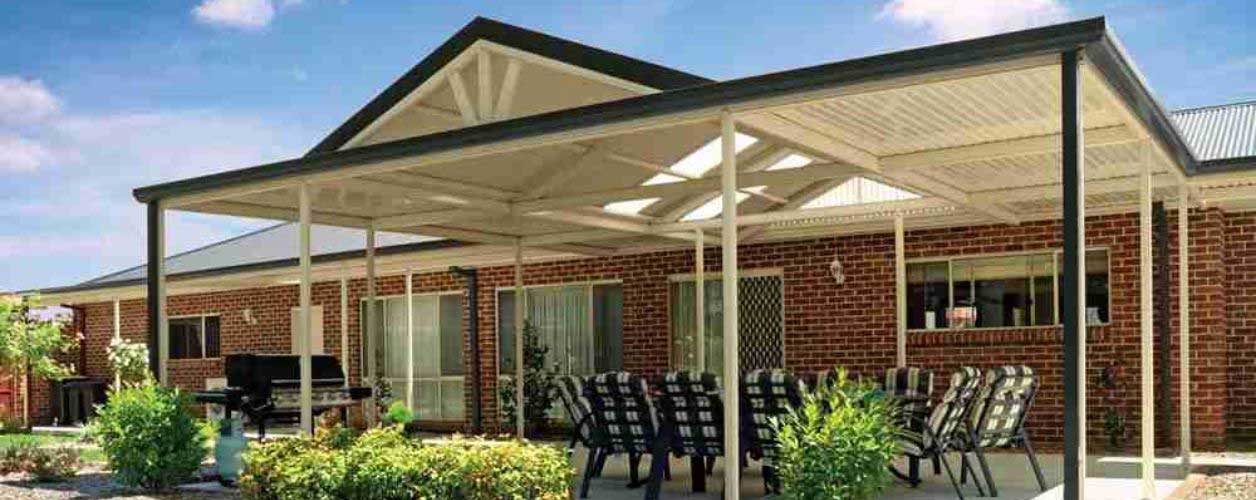
Gable & Pitched Roof Verandahs
Classic, elegant, and perfect for airflow. Gives that “airy outdoor living” feel. Best for bigger homes and entertaining areas.
Skillion Roof Designs
A single sloping roof with a sharper angle than a flat roof. Best for modern architectural homes or properties needing strong water runoff.
Curved & Custom Verandahs
Luxury, modern, resort-style outdoor living. Best for premium builds, poolside areas, and statement homes.
Comparing Attached vs Freestanding Verandah
Attached Verandahs
Connected directly to your home. Great for extending living space.
Pros:
- Seamless indoor–outdoor flow
- Often cheaper than freestanding
- Great weather protection
Cons:
- Must match the roofline & council rules
- Requires proper house attachment points
Freestanding Verandahs
Built separately from the house. Works well as a garden feature.
Pros:
- More flexible placement
- No need to alter your house structure
- Perfect for BBQ zones, outdoor seating
Cons:
- Usually pricier
- Not as protective during storms
Step-by-Step Verandah Installation Guide
Whether you’re DIY-inclined or planning to hire pros, here’s the breakdown:
Planning Your Verandah
Measure width, depth, and height. Determine purpose (shade, dining, storage). Check for existing gutters and power points.
Choosing Materials and Design
Ensure the design blends with your home (e.g., don't put a super-modern verandah on a heritage cottage).
Checking Regulations & Permits
Check council approval for attached structures, stormwater flow, and roofline changes.
Preparing the Site
Level the ground. Ensure drainage flows AWAY from the house. Mark out posts using string lines.
Building the Structure
Install posts into concrete footings, set beams, and create the "bones" of the verandah.
Attaching Roof & Flooring
Install rafters, trusses, and roofing sheets (Colorbond/Polycarb). Lay flooring (decking, concrete, or pavers).
Finishing Touches
Seal timber, paint metal frames, install gutters, LED lights, fans, and power points.
DIY Installation vs Professional Installation
DIY Verandah Installation
Cheaper upfront, but requires skill.
Pros:
- Save on labour costs
- Full creative control
- Satisfying for confident builders
Cons:
- Permit headaches
- Risk of structural mistakes
- No warranty & insurance issues
Worth it when: Using a kit, building small/freestanding, and you have experience.
Professional Installation
Guaranteed quality and compliance.
Pros:
- Meets Australian Standards
- Structural integrity & warranty
- Faster installation
Cons:
- Higher cost (labour)
- Scheduling delays
Required when: Attached to house, roof modifications, Bushfire zones, or steel frames.
Typical Labour Costs for Verandah Installation
$50 – $110 per hour for general verandah installers
$70 – $140 per hour for carpenters/builders
$600 – $1,500 per day for a full team
Total labour cost: Usually $2,000 – $10,000+, depending on size
Best Verandah Installation Options
Who builds your verandah is just as important as the materials.
The go-to for most homeowners. Best for attached verandahs, large builds, and complex roofs.
Pre-cut and pre-measured. Best for budget builds, rental properties, and handy homeowners.
Tailored plans. Best for high-end homes, curved roofs, or strict council areas.
Maintenance Tips to Keep Your Verandah Looking New
| Material Type | Maintenance Frequency | Key Tips |
|---|---|---|
| Timber | Every 2–3 years | Seal/stain, inspect for termites. |
| Aluminium | Quarterly | Wash, check screws and joints. |
| Colorbond | Twice a year | Clean, touch up paint, check gutters. |
| Glass/Polycarbonate | Quarterly | Wash, inspect for cracks or scratches. |
| Steel Frames | Annually | Check for rust, recoat if necessary. |
How to Hire the Best Verandah Builder
1. Start With Local Specialists
Look for builders who regularly work in your region to ensure they understand council regulations and climate conditions.
2. Check Reviews
Use Google, ProductReview, or Trustpilot. Ignore testimonials on their own website if they aren't backed up elsewhere.
3. Ask Must-Know Questions
- “How many verandahs have you built in the past year?”
- “Are you licensed for verandah construction in my state?”
- “Do you have valid public liability insurance?”
- “Will you handle council permits?”
- “Do you offer warranty on workmanship?”
4. Compare More Than Price
Cheap quotes often mean cheap materials. Compare warranty length, timeline, and communication clarity.
5. Get Everything in Writing
Contract should cover: Full cost breakdown, Timeline, Materials list, Warranty details, and Deposit amount (never pay 50% upfront!).
Conclusion
From choosing the right materials, design, and roof style to navigating permits, climate considerations, and installation options, every decision impacts both cost and longevity.
Planning is everything. Whether you go DIY with a verandah kit, hire a licensed builder, or work with custom design specialists, the key is to plan thoroughly, invest wisely, and maintain consistently. A verandah done right becomes a seamless extension of your home for years to come.
YOU MIGHT ALSO BE INTERESTED IN