What Are The Causes of Cracks in Bathroom Tiles?
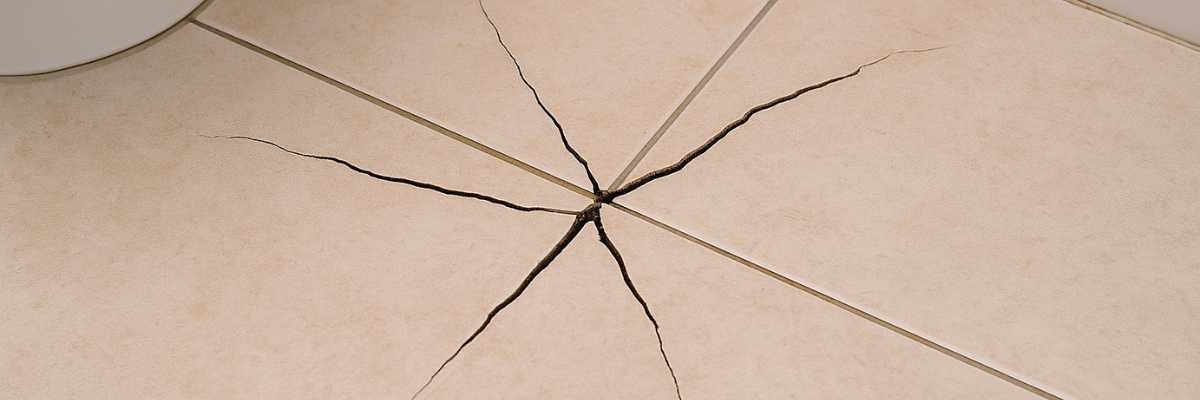
Table Of Content
- Introduction
- Causes Of Cracks In Bathroom Tiles
- Why Tile Repair Is Essential For Your Bathroom?
- How To Avoid The Cracked Tiles
- How To Fix A Broken Tile Without Fully Replacing It?
- Conclusion
Floor tiles are known to be a material that maximises the glamour of the area in which they are laid and at the same time, the tiles also bring the beauty of elegance with them. To those who have tasted cracked tiles, you know well enough how annoying and costly it is to replace or repair the same.
Floor tile cracking is a technical term used when describing situations where your floor tiles show signs of fracturing, breaking, or having the smallest of cracks on them. Such cracks could be small narrow cracks barely visible that affect only the tile face or wide ugly cracks that penetrate the tile inwards. In certain instances, these fractures could indicate deeper structural problems that could endanger the structural integrity of your house or place of business more seriously than just being visually unpleasant.
We've put together this in-depth to assist you in understanding the cause of floor tile cracking, how tile regrouting can help restore your tiled surfaces, and how to prevent cracks in the first place. Let's get started and investigate typical reasons for broken tiles as well as practical solutions.
Causes Of Cracks In Bathroom Tiles
Here are some of the most common causes of floor tile cracks. Several things can lead to the formation of floor tile cracks:
Hard Impacts
One of the main causes of floor tile cracks is hard impacts. Heavy objects dropped onto the tiles or sharp blows can cause the tiles to immediately crack or weaken over time. It's important to exercise caution when moving furniture or other heavy items on tiled surfaces to prevent your floors from getting cracked.
Putting Too Much Weight on It
Tiles that are subjected to excessive weight or pressure may crack, particularly in places where there is insufficient structural support. This may occur via the direct placement of heavy things on the tiles or from concentrated weight on particular areas. To avoid cracking, use the appropriate support and pay attention to how weight is distributed throughout your tiled surfaces.
Covering Control Joints with Tiles
Building materials are intended to expand and move naturally through the use of control joints or expansion joints. When tiling, ignoring these joints might limit the flooring's ability to move, putting stress on the tiles and increasing the risk of cracks and tile bursting. To account for expansion and contraction, pay close attention to control joints and adhere to recommended tile placement techniques.
Low-grade tiles were utilised
Certain types of tiles are inappropriate for specific applications, and not all tiles are made equal. The majority of homeowners believe that the tiles are to blame because they are the only parts of the installed floors that are visible. It's possible that the contractor used subpar tiles when installing the bathroom tiles, even though this is usually not the case. To prevent this mistake, review the tile specs before making large purchases of them. Acquire tile from reliable merchants, hardware stores, and licensed internet merchants.
Not Installed Correctly
Tile cracks may result from subpar installation techniques. Common installation errors that can lead to cracked tiles include inadequate substrate preparation, incorrect grouting, and inadequate adhesive coverage. To avoid such problems, it's essential to work with a competent tile installer or experienced bathroom tilers who adhere to installation best practices.
Broken Substrate
The durability of tiles is significantly influenced by the subfloor or underlying surface. Damage, cracks, or uneven subflooring can put stress on the tiles above and cause them to break. Before installing tiles, make sure the substrate is in good shape and take quick action to fix any structural problems.
Inadequate distance between floor beams
Under your flooring, joists are substantial timbers that support everything above it. They maintain everything firmly in position. The plywood might bend excessively when there are large spaces between two joints. A gap is created when a rock-solid surface is beneath a flexible surface. That gap will crack or fracture when pressure builds up on top of it. Eventually, this causes the structure to become unstable, which breaks the tiles above. Restricting the flex to stop the tiles from breaking is another benefit of adding more underlayment structures.
The movement inside the framework
Tiles in a residence can compress and break under strain due to excessive building movement caused by earth movement, foundation collapse, and blueprint problems. These cracks tend to spread across several tiles and do not have surface chips, which sets them apart from those caused by a direct impact. The bathroom needs to be inspected by a waterproofing specialist to make sure the waterproofing system is still working properly, and any cracks that are found need to be fixed right away.
Using an incorrect kind of adhesive
It's also essential to use the right tile adhesive to stop cracks from forming. Applying the wrong glue will prevent the tiles from sticking to the subfloors. The likelihood of large cracks forming in the tile increases in the absence of adequate support.
Variations in the climate or temperature
Your home's temperature variations could not be that big and shouldn't have much of an impact on the tiles' structural integrity. If tiles lack frost resistance and are not made for outdoor use, then extreme temperature fluctuations may make them more brittle.
Why Tile Repair Is Essential For Your Bathroom?
The Significance of Tile Repair in Your Bathroom Repairing bathroom tiles as soon as possible is essential, particularly if the shower grout is damaged. Moisture that stays trapped in the crevices can also shorten the waterproofing's life and seep into the flooring. Consequently, the building's overall structural integrity may be compromised if timber supports start to decay. The repairs will become unnecessarily expensive as a result of this. You should insulate your bathroom's waterproofing to prevent harm to adjoining rooms.
How To Avoid The Cracked Tiles
If you want to avoid broken tiles, prevention is the key. You may lessen the chance of floor tiles breaking and save yourself the trouble of fixing a fractured tile by being proactive. To prevent cracked tiles, consider putting these tips into practice:
Select Porcelain Tiles: The durability and crack resistance of porcelain tiles are exceptional. The likelihood of tile cracking can be considerably decreased by choosing these kinds of tiles. Given that porcelain tiles are strong and resilient to wear and tear, they are a great option for places with high traffic.
Identify any dead spots: Make sure the subfloor is completely inspected for any hollow or uneven areas before installing tiles. These "dead spots" may cause the tiles to become brittle and more prone to fracture. Before tiling, fix any problems by strengthening or repairing the subfloor.
Make Use of Concrete Subfloor and Plywood: Tile cracking must be avoided by properly prepping the subfloor. To make the tile surface level and solid, use plywood and a concrete foundation. This lessens the chance of cracks from an unsteady foundation and aids in the even distribution of weight.
Consider Expansion: It is essential to provide for expansion joints in larger spaces or places that are subject to temperature variations. These joints allow the tiles to move naturally, avoiding cracks caused by stress. To find the right expansion joint spacing and location, speak with a qualified installer or adhere to industry standards.
How To Fix A Broken Tile Without Fully Replacing It?
Tiles can occasionally sustain damage due to accidents. However, imagine being able to replace a broken tile without having to deal with the inconvenience of taking it out and starting over. This thorough guide will save you time, effort, and money by demonstrating how to fix a variety of broken tile types without having to replace them entirely.
Assess the damage: Assess the damaged tile to ascertain the amount of the harm and select the best restoration technique. You can probably fix broken, chipped, or slightly missing tile without having to replace it entirely. This can be needed, however, if the tile is badly cracked or if the damage interferes with the structural integrity of the tile.
Clean up the damaged area: It is also very important that the area that was affected by the breakage of the tiles is swept clean before replacement. They will tell you if the afflicted region requires washing with water and soap using a cloth or brush and then washing with water to remove any dirt. For any small scratches, rub the area surrounding the scratch with an emery paper of at least 800 grit.
Choose the appropriate repair method: The correct method can be chosen depending on the type of damage.
Minor Scratches: You may conceal minor surface scratches on the tile by using fine-grit sandpaper or clear nail polish.
Tiny Chips: To fill in the spaces left by tiny chips in the tile, use epoxy resin or tile repair adhesive.
Cracks: To seal fractured tile fragments together and stop additional damage, use epoxy resin or tile repair adhesive.
Missing Pieces: If there are larger missing pieces in the tiles then one can apply epoxy resin or tile repair adhesive and then paint the tile and reapply grout as required.
Apply and combine tile repair adhesive or epoxy resin: Wear safety goggles and mix the tile repair adhesive or epoxy resin strictly as described by the manufacturers’ recommendations. The gaps and missing fragments should be also considered, so use the adhesive with a toothpick or a brush to apply it to the cracked place.
Remove excess Adhesive: Ensure that the repaired area lies in harmony with the other tiles by scraping off any excessive adhesive material after it has been put in place, using a putty knife or spatula. Allow the adhesive enough time so that it can cure as specified by the manufacturer of the adhesive.
Optional steps: In the case where the repaired section does not blend with the rest of the tiles then one can paint the repaired area. You might need to regrout the tile in the area of the repair that came in contact with the tile’s grouted edges. To ensure that the grout does not deteriorate in the future, apply a grout sealer on the grout once it has set hard.
Polish and Clean the Fixated Tile: After the adhesive, paint, and grout have dried, if it is necessary to apply it, then clean the repaired tile with a damp cloth or sponge to remove any remains. If needed, you can also apply a mild tile cleanser. For a polished appearance, use a dry cloth to buff the mended area. Properly inspect and clean your tiles regularly.
Conclusion
Poor installation, movement in the foundation, and normal wear and tear over time are some of the causes of bathroom tile cracks. Heat stress, moisture intrusion, and strong impacts could all be additional factors. It is important to use high-quality materials during installation, provide enough space for expansion joints, and keep a steady atmosphere to reduce temperature swings to prevent these cracks. The lifespan of your bathroom tiles can be increased and expensive future repairs can be avoided with routine maintenance, such as quickly fixing minor damage and sealing grout lines.
YOU MIGHT ALSO BE INTERESTED IN