How to Install Artificial Grass: A Complete DIY Grass Installation Guide
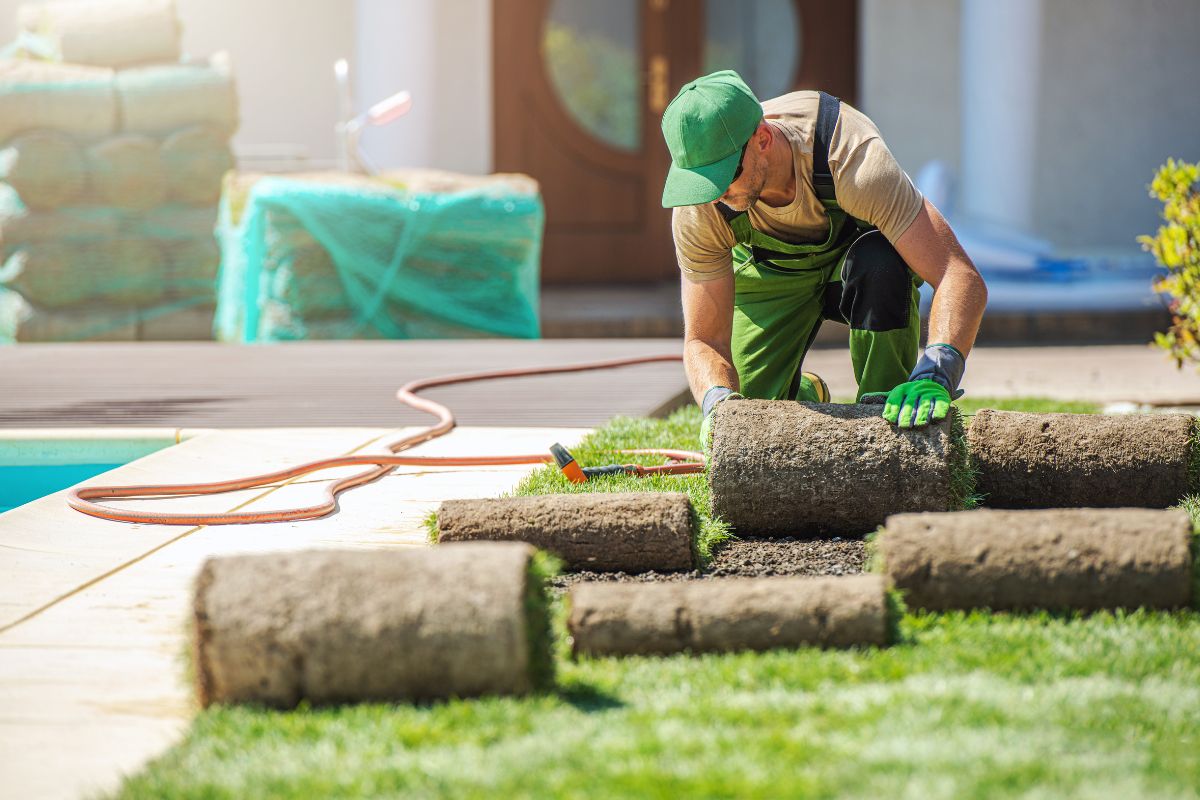
Table Of Content
- Introduction
- Tools and materials required
- Preparation for artificial grass installation
- Base installation
- Laying the artificial grass
- Securing the grass
- Adding infill to artificial grass
- Trimming and final touches for a polished lawn
- Maintenance tips
- Conclusion
Adding artificial grass to your outside area is a great way to have a lush, low-maintenance lawn all year round. Doing your turf installation can save money and give you a sense of achievement. Everything from setting up your space to fastening the grass for a smooth, polished appearance is covered in this comprehensive do-it-yourself tutorial. However, if you prefer a professional touch, consider reaching out to hard landscapers near you for expert installation and advice. This guarantees that you will have the skills and information necessary to effectively take on any job, whether you're improving a rooftop, patio, or backyard. A beautiful, everlasting landscape awaits you when you say goodbye to mowing and watering! Let's begin creating the lawn of your dreams.
Tools And Materials Required For Artificial Turf Installation
Essential Tools
- Tape measures: The Tape Measure precisely measures the installation space to guarantee the appropriate turf placement.
- Utility Knife: An essential tool for cutting artificial turf to the appropriate size is a utility knife.
- Rake: Rakes are used to level the ground and distribute filler material uniformly.
- Shovel: A shovel is used to clear the area and remove rubbish to properly prepare the base.
- Hand Tamper or Compactor for Plates: Compacting the soil or base material guarantees a level and sturdy surface.
- Seaming tool: Using a seaming tool, turf portions can be joined smoothly for a polished appearance.
- Rubber Mallet: To secure stakes or edging without causing damage to the turf, use a rubber mallet.
- Stiff brush: A stiff brush facilitates uniform infill distribution and fluffing up the turf fibres.
- Garden hose: Use a garden hose to moisten and clean the foundation while it is being installed.
- Safety gloves and goggles: Safety Goggles and gloves When handling and cutting materials, wear protective gear.
Required Materials
- Artificial Turf: Depending on personal desire, the primary component comes in a variety of styles, pile heights, and colours.
- Adhesive or turf tape: For a durable installation, glue or turf tape is used to seal edges and seams.
- Infill Material: To improve the beauty and give stability, put rubber granules or sand over the lawn.
- Base material: The turf is supported by a solid base, usually made of gravel or crushed stone.
- Edging material: The perimeter can be secured and moving prevented by metal or plastic edging.
- Barrier Fabric for Weeds: Put in place beneath the turf to stop weeds from growing.
- Turf Staples or Nails: Fasten the artificial turf firmly.
- Silica sand: Although it's optional, silica sand improves drainage and maintains the turf fibres' upright position.
The correct equipment and supplies can help you install artificial turf in a perfect and long-lasting manner.
Preparation For Artificial Grass Installation
- How to Choose the Best Artificial Grass Type
Durability, aesthetics, and functionality are all important considerations when selecting the ideal artificial grass. Stronger fibres like nylon or polyethylene are better choices for high-traffic locations. Choose grass with a natural-looking blend of green hues and different blade lengths if aesthetics are important to you. To maintain endurance and avoid fading, take into account UV-resistant choices for outdoor areas. - Area Measurement
Determining the necessary amount of turf requires precise measurements. First, determine the area's length and breadth in either meters or feet, whichever you like. Divide the area into smaller parts for irregular spaces, measure each part, and then figure out the total area. For installation-related changes, overlaps, and cuts, add 10% to 15%. - Leveling and clearing the terrain
Start by using a shovel or sod cutter to remove any existing grass, rocks, weeds, and rubbish. Use a rake to fill in low areas and smooth out uneven soil surfaces. For a solid base, use a roller or tamper to compact the soil. For stability and drainage, think about spreading sand or crushed stone to create a flat area on which to lay fake grass.
Base Installation
For any building project to be stable and long-lasting, a solid base installation is essential.
- A sub-base layer, usually composed of sand or crushed rock, is added first to create a solid foundation.
- To create a consistent surface, this layer is levelled and spread evenly. The next crucial stage is compaction, which involves compressing the sub-base with specialized machinery to close air spaces and improve stability.
- By preventing future settling or shifting, proper compaction guarantees that the base can tolerate high loads and a variety of circumstances. This procedure produces a strong foundation, which is necessary for projects like patios, driveways, and concrete slabs to be effective.
Laying The Artificial Grass
Cutting and Positioning the turf
Careful cutting, placing, and alignment are necessary when laying artificial grass to provide a smooth, natural-looking finish.
- To minimize wrinkles and folds, start by unrolling the artificial turf and giving it a few hours to settle.
- Using a sharp utility knife, cut the turf with perfect edges after taking precise measurements of the area. To preserve the integrity of the grass fibres, always cut from the back of the lawn.
- Carefully place the turf pieces such that there are few overlaps or spaces between them.
- For a unified appearance, arrange the sections in the same direction. Secure the seams with joining tape or glue, pushing the edges firmly together to prevent obvious lines. While the adhesive is setting, briefly weigh down the edges.
Ensuring Proper Alignment and Minimal Seams
A quality finish depends on proper alignment.
- Verify that the turf is parallel to the nearby structures and make any necessary adjustments. For a neat fit, remove extra turf along the edges after alignment.
- Secure the turf around the perimeter with landscape staples or nails to guarantee durability.
- Lastly, to merge seams and produce a natural look, brush the grass fibres upward.
Securing The Grass
- Protecting the Grass: Making Sure It's Perfect
Artificial turf must be securely fastened for longevity and a smooth look. Two popular techniques include connecting several sections seamlessly and applying glue or nails to the lawn margins. - Using Nails or Adhesives
The use of nails or adhesives gives lawn edges a solid anchor, preventing them from lifting or curling over time. Usually, galvanized nails are hammered into the ground around the edge, 15 to 20 cm apart. This keeps the turf level and firmly in place. On the other hand, superior adhesives used on the edges produce a durable connection, particularly on hard surfaces like concrete. By guarding against movement brought on by foot activity or weather, both techniques aid in maintaining a clean finish. - Connecting Turf Sections Effortlessly
Several turf rolls need to be connected when covering larger areas. The components are perfectly aligned and joined using glue and seam tape. To prevent gaps, the turf's margins are cut and placed together. The adhesive is evenly applied along the seam tape, which is placed underneath the joining edges. An invisible seam is produced by pressing the edges together. Temporarily, weighted objects can be employed to make sure the bond sets correctly. These methods increase the turf's durability and allure while ensuring a safe, polished appearance.
Adding Infill To Artificial Grass
Types and Useful Advice
When installing artificial grass, infill is crucial because it offers stability, support, and increased durability. Sand and rubber are the two main forms of filler. Because of its weight, affordability, and capacity to keep the turf's blades upright, sand infill—such as silica sand—is frequently utilized. Rubber infill is perfect for playgrounds and sports fields because it provides superior shock absorption and is usually composed of recycled materials.
To disperse infill uniformly:
- Get the Surface Ready: Make sure the artificial grass is dry, clean, and uniformly distributed.
- Employ the Proper Equipment: For smaller areas, spread the infill by hand or with a drop spreader.
- Distribute Evenly: To prevent unequal distribution, begin from one end and proceed methodically.
Use a stiff-bristled broom or power brush to push the infill into the grass fibres once it has been spread. Brush in several directions to avoid clumping and provide complete coverage. This procedure aids in lawn stabilization, improves its organic appearance, and ensures adequate drainage. Your artificial grass installation can survive for a long time if you do routine maintenance, such as brushing and adding more infill as necessary.
Trimming And Final Touches For A Polished Lawn
It takes more than just mowing to have a perfectly maintained lawn; it also requires trimming the edges and paying close attention to details. Your yard will look more polished and have more visual appeal if you trim any extra grass. Here's how to refine the procedure and guarantee long-lasting effects.
- Select Appropriate Trimming Equipment: The correct tools are essential for accurate trimming. Tight corners, walkways, and borders are good places for a string edger or trimmer. Sharp hand shears can aid in maintaining accuracy in narrow areas. To ensure clean cuts, always keep your tools in good working order and keep your blades sharp.
- Adhere to a Regular Pattern: Trim the margins of fences, flower beds, and walks first. To prevent uneven cuts, move with control and steadiness. For a unified appearance throughout the grass, make sure you keep the height constant.
- Even Out the Edges: After pruning, remove any loose grass clippings using a broom or blower. This stage aids in identifying any uneven areas that may require more care. A neat finish is produced by edges that are defined and smooth.
- Keep the Grass Healthy: Water the trimmed grass frequently and fertilize it as necessary to maintain its stability and evenness. Cutting the grass too short might cause stress and uneven growth, so avoid doing so. For most lawns, a height of 2.5–4 cm is ideal.
- Evaluate and Modify: Often To keep the lawn looking nice and manage overgrowth, check it once a week. Consider reseeding or aerating for healthy regrowth if certain areas seem scant. Regular maintenance, including trimming and finishing touches, will make your lawn seem flawless and enhance the overall appeal of your outdoor area.
Maintenance Tips: Cleaning and Caring for Artificial Grass
Frequent Brushing:
- Regularly brush the turf with an artificial grass rake or a stiff-bristled broom.
- In high-traffic areas, in particular, this helps keep the grass straight and avoid matting.
Removal of Debris:
- Use a leaf blower or rake to clear away leaves, twigs, and other debris.
- Frequent cleaning avoids accumulation that could promote the growth of moss and weeds.
Rinsing:
- Cleaning Every week, hose the grass down with water to get rid of light debris, dust, and pollen.
- For pet messes or sticky spills, use mild soapy water.
Prevention of Weeds:
- Place a weed barrier beneath the lawn to reduce weed growth during installation.
- Regularly check the edges and remove any emerging weeds.
Taking Care of Pets:
- Remove any solid waste as soon as possible, then wash the area with water and a disinfectant that is safe for pets.
- This keeps the grass fresh and stops odours from accumulating.
Cleaning of Spots:
- Use a turf-safe cleanser or a mild detergent for stains like paint, oil, or food.
- Steer clear of harsh chemicals as they can harm synthetic fibres.
Drainage Inspection:
- To stop water from collecting, make sure the drainage system is operating.
- Blockages can be removed if needed.
Keep Out of the Heat:
- Grills and fire pits should not be set up directly on the lawn.
- For protection against heat damage, use mats or coverings.
Expert Maintenance:
- A professional cleaning should be scheduled once a year for complete revitalization.
Your fake grass will continue to be colourful, clean, and long-lasting if you heed these guidelines.
Conclusion
Artificial grass installation is a satisfying do-it-yourself project that offers ease of use, affordability, and long-term advantages. A beautiful, low-maintenance lawn that remains green all year long may be achieved with simple tools and a little work. Bid farewell to muddy areas, watering, and mowing while taking pleasure in an environmentally responsible and aesthetically pleasing area. Make your outside space a beautiful, hassle-free retreat by embarking on a do-it-yourself adventure!
Answers to Your Common Questions
The cost depends on the area's size, the kind of artificial grass, and how challenging it is to install. The average price per square meter in Australia, including labour and supplies, is between $50 and $100.
Premium artificial grass may last up to 15 years or more with the right maintenance and use.
The fact that it doesn't need fertilizer, pesticides, or watering means that it does have a less detrimental impact on the environment. However, one should consider its synthetic makeup.
It is possible to install artificial grass on a variety of surfaces, such as tiles, decks, concrete, and soil. A well-prepared surface is necessary for both longevity and beauty.
Because high-quality artificial grass is made to resist sun, rain, and frost, it is appropriate for Australian weather.
YOU MIGHT ALSO BE INTERESTED IN