Step-by-Step Guide: How to Apply Epoxy Floor Coating Like a Pro
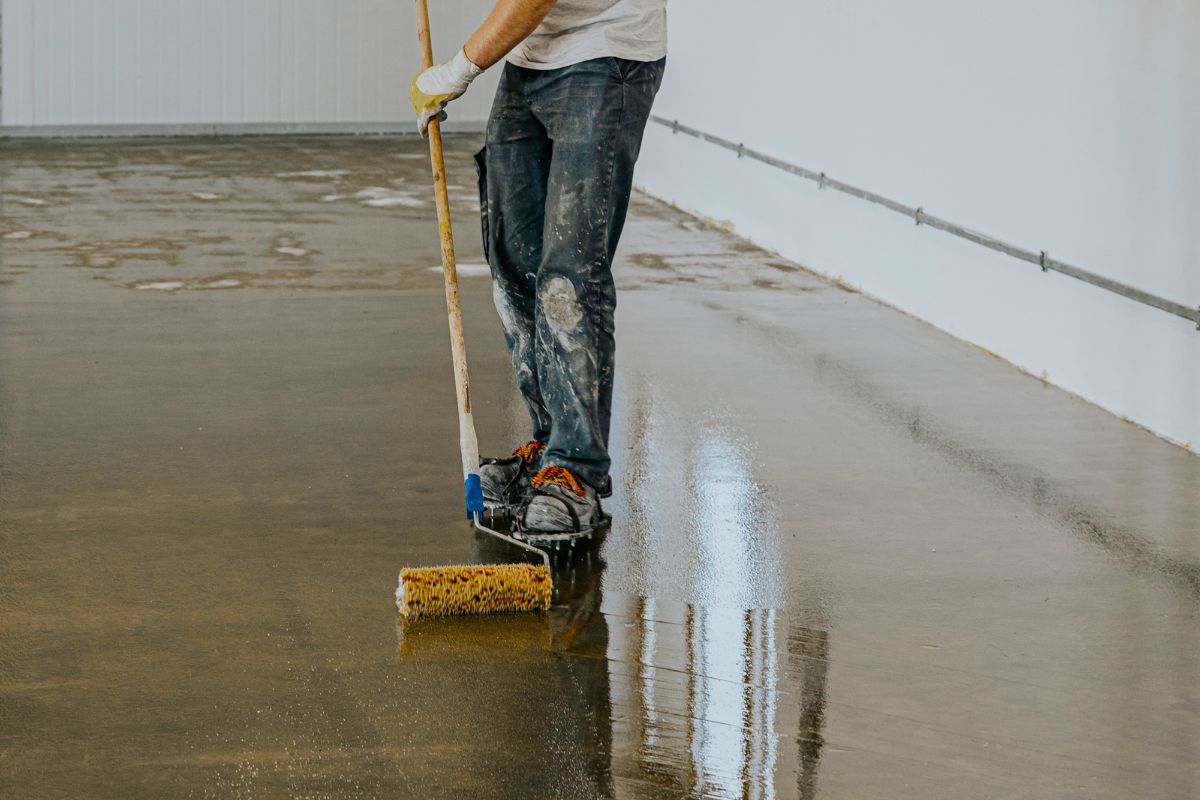
Table Of Content
- Introduction
- What is Epoxy Flooring?
- Tools and Materials You’ll Need
- How To Apply Epoxy Floor Coating?
- Epoxy Floor Maintenance Tips
- Troubleshooting Common Epoxy Floor Issues
- Conclusion
The durability and style of epoxy floor coatings help them become a favourite solution across different spaces including home garages and industrial buildings. You can create beautiful professional epoxy floors through proper preparation plus correct equipment usage. Through this complete step-by-step guide, we present how to achieve professional results in epoxy flooring projects following the expertise of Australia's top industry competitors. When you complete this guide you will have everything needed to start your epoxy floor project successfully.
What is Epoxy Flooring?
Concrete floors receive a strong epoxy-based coating to develop lifetime endurance. Applied correctly, epoxy creates a strong impermeable surface with a reflective gloss that handles daily traffic and protects from spills along with water or chemical contact. Epoxy systems work best in different floor types such as garage rooms, basement areas, vehicle workshops, display spaces and professional areas.
Why Choose Epoxy Flooring?
There are several reasons why epoxy is a popular choice for flooring:
- Aesthetic Appeal: Epoxy floor coatings offer unique standard and customized colours plus finishes that let you pick your preferred design.
- Easy Maintenance: Since epoxy floors are smooth and free from pores they remain simple to clean and maintain. You can quickly remove liquid messes and surface marks from epoxy flooring.
- Chemical Resistance: Epoxy coatings stand up well when exposed to strong chemicals so people often use them in production facilities.
- Long-Lasting: Epoxy displays exceptional durability that blocks and survives both minor and major surface hits. When installed correctly an epoxy floor can stay resistant to damage for several years without needing new floors or repairs.
Because epoxy flooring offers numerous benefits it has become the leading flooring solution for Australian homeowners and business owners.
Tools and Materials You’ll Need
Before starting, gather the following materials to ensure the application process goes smoothly:
Materials:
The materials needed are:
- Epoxy resin and hardener packaged according to your floor area size.
- Epoxy primer to strengthen the bond on the surface.
- Choose a flooring base coat and top coat based on your selected output type.
Tools:
- A diamond sander or Floor Grinder to prepare surface material.
- Need a vacuum cleaner and a broom as cleaning tools.
- You need a painting toolset including both a roller and brush to spread the epoxy coat.
- You need a special trowel tool to distribute thick epoxy layers.
- You need a holder and sticks to mix epoxy resin.
- Gloves, safety goggles, respirator mask and other protection Tools
- Painter tape to protect the edges of baseboards and surfaces
- Bucket for mixing and pouring
- Special cleaning product for smooth floors
- Use concrete repair powder to seal damaged areas before you start building
Using your prepared materials, start applying epoxy floor coating with professional results.
How To Apply Epoxy Floor Coating?
Step 1: Prepare the Floor Surface
You need to start by making sure the floor surface is ready for epoxy coating correctly. A proper floor surface preparation is essential because epoxy won't stick well and will quickly start to peel. Here’s how you can prepare your concrete floor:
- Clean the Floor Thoroughly: Clean the area by using both the broom and vacuum to take away soil and mess. Treat grease spots and stains with a degreaser before moving forward. Preventing dirty spots helps epoxy stick better to the surface.
- Repair Cracks and Holes: Cover floor problems with a concrete patching mix. Press the concrete patching mix evenly with a trowel and wait until all repairs are fully dry. An uneven surface will make the epoxy settle wrong which produces irregular results.
- Etch the Concrete: An even concrete surface needs etching before the epoxy bond will stick properly. Stone materials remove the smoothness from concrete using a chemical solution or a powerful floor grinding machine. The etching technique or grinding produces small texture lines on the floor to support the epoxy bond.
- Dry the Floor: After cleaning and etching wait at least 24 hours for proper drying both when you use a degreaser or patching material. You must wait until every drop of moisture disappears from the floor to start working with epoxy because water blocks proper curing
Step 2: Apply the Epoxy Primer
A primer helps epoxy stick better and lasts longer so it is strongly advised for best results. Here’s how to apply the primer:
- Choose the Right Primer: Episode coating success depends on picking primer types that work with your flooring surface and selected epoxy. Different primer types exist including epoxy coating primer and moisture-blocking primer systems plus others for targeted applications.
- Roll the Primer onto the Floor: Take a paint roller and put the primer evenly over the concrete surface. Begin your work at the first corner of the room and advance toward the door to keep away from the new primer installation.
- Let the Primer Dry: Per manufacturer requirements allow the primer to dry in between 6 and 8 hours until it reaches its complete state. Before proceeding make sure the surface has dried completely and there is no stickiness left.
Step 3: Mix the Epoxy Resin and Hardener
The correct mix between epoxy resin and hardener determines both mixture texture and proper curing results.
- Read the Instructions: The epoxy coating label shows precise measurement guidelines for mixing resin and hardener. Keep to instruction guidelines to make the best possible coating.
- Mix Thoroughly: Put your materials in a clean bucket to blend resin and hardener. Use a stick or paddle to mix the materials for at least several minutes to get perfect blending. Short mixing leads to incorrect curing and longer mixing makes the substance set too early.
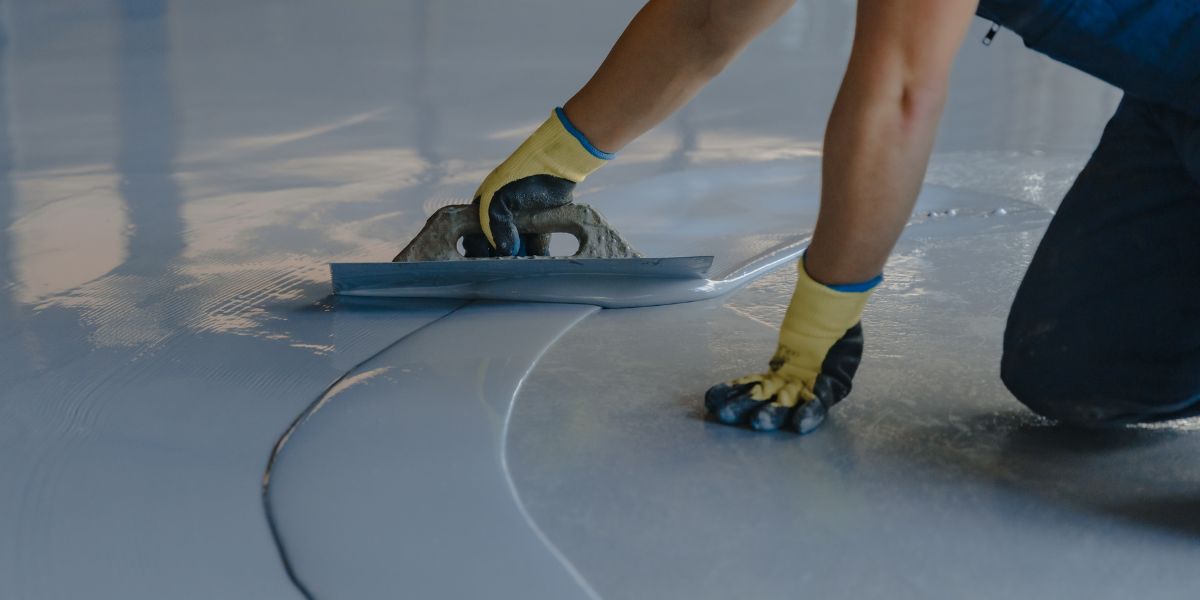
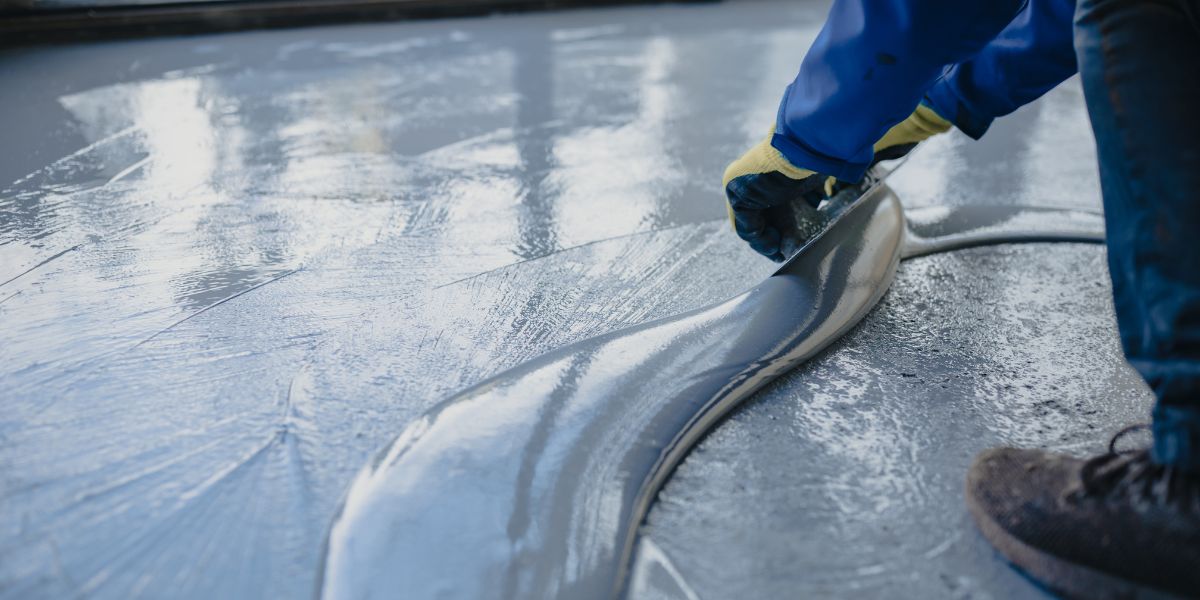
Step 4: Apply the Epoxy Base Coat
Now it’s time to apply the base coat of epoxy:
- Start at the Farthest Point: Begin your application at the room's most distant corner next to the exit. Your active path ensures you do not walk on fresh epoxy applications.
- Use a Paint Roller: To achieve an even base coat use a premium paint roller with medium nap to spread a thin coat of epoxy across the surface. Apply the coating in small areas and do smooth overlapping strokes to cover every part.
- Smooth Out the Epoxy: When the base coat is on, use a brush to correct sections that are streaky or not level. You need to make sure the epoxy coat layer level remains flat across the surface.
- Allow the Base Coat to Dry: Make the base coat dry for its normal curing time which is 12 to 24 hours. Test the surface tacking quality by applying gentle surface pressure. If the surface remains sticky, wait for additional drying time.
Step 5: Apply the Epoxy Top Coat
You need to put on the protective last layer to make your surface shine. Here's how to apply it:
- Apply the Top Coat: Repeat the base coat method when applying the top coat onto dry surfaces. Use a roller to put the topcoat on before using a brush to spread it even. Expand the top coat coating in smooth and even strokes across the area.
- Ensure Full Coverage: Work in small areas moving fast because two-part epoxy products cure speedily.
- Add Decorative Flakes (Optional): You can customize the top layer by sprinkling decorative flakes or chips onto the wet top coat before it dries. Similar to surface texturing this step improves safety and enables you to personalize your flooring design.
Step 6: Let the Epoxy Cure
After applying the top coat you need to wait until the epoxy cures fully. The drying process usually takes between two and three days to complete. Keep all feet off the surface and let fresh air flow through the room until the whole epoxy hardens.
Epoxy Floor Maintenance Tips
Following proper epoxy floor installation and curing you must protect its performance and look for several years. Here are some essential maintenance tips to keep your floor looking its best:
1. Regular Cleaning
Epoxy flooring has a big advantage because it stays clean with simple care methods. The smooth, non-porous surface prevents dirt, dust, and stains from sticking, but routine cleaning is still necessary to preserve the finish:
- Sweep or vacuum regularly: Daily vacuuming and broom cleaning will keep dust and wreckage off the surface.
- Mop with warm water and mild detergent: For significant dirt removal apply a mop with warm water plus gentle pH-balanced cleaner. Do not use strong cleaning chemicals because they harm epoxy coatings.
- Avoid abrasive cleaners: Abrasive cleaning tools will harm epoxy so stick to smooth microfiber cloth and sponges for cleaning.
2. Address Spills Promptly
Although epoxy floors stand up against numerous spills better than other surfaces these liquids need fast cleanup to protect the flooring. Wipe up oil, chemical, and food spills with a wet cloth but do not let liquid sit on the floor for extended periods.
3. Reseal the Floor Periodically
The epoxy top coat will experience damage from prolonged exposure to traffic or UV rays. Epoxy floors will remain beautiful when you reapply a new sealant coating every 3 to 5 years. Apply fresh clear epoxy to restore the topcoat's shine and lifetime of your floor surface.
4. Prevent Damage
Use rugs or mats in high-traffic areas: Putting rugs in areas with lots of foot traffic will shield your floor from everyday damage.
Avoid dragging heavy furniture: Although epoxy floors are tough they may become damaged when moving large items across them. Keep your hands underneath the furniture to pick it up rather than pulling it across the floor.
5. Fix Minor Damage Quickly
Take care of small epoxy cracks and chips right away to stop them from getting worse. Small damaged areas become easier to fix when you gently sand the spot and add a little fresh epoxy to the location.
Troubleshooting Common Epoxy Floor Issues
1. Bubbles or Air Pockets
- Cause: Mixing errors or spray application issues allow air to get trapped in the system.
- Solution: Exercise gentle stirring when mixing and use heat tools after application to pop air bubbles. Finish the job under controlled air conditions.
2. Uneven Coating or Streaks
- Cause: Applying paint too heavily or in an uneven pattern with repeated overapplication.
- Solution: Use thin consistent layers by passing the roller once in one direction across smaller work areas.
3. Epoxy Peeling or Lifting
- Cause: Low-quality preparation steps combined with not waiting for a full cure.
- Solution: Follow the directions to clean flooring surfaces and fix problems while giving epoxy enough time to cure properly.
4. Cloudy or Dull Finish
- Cause: The finish can become dull when temperatures and humidity levels are wrong during application along with using poor epoxy and ending the curing phase too soon.
- Solution: Use adhesion-specific epoxy at its recommended usage temperature and polish your work for improved shine when needed.
5. Sticky or Soft Finish
- Cause: The epoxy surface quality problems stem from incorrect preparation during mixing and curing plus contact with water.
- Solution: Stick to proper mixing proportions plus let the product completely dry before putting weight on the floor.
6. Color Mismatch
- Cause: Foreign material appears between epoxy components because of improper mixing.
- Solution: Stir the epoxy properly until all particles show the correct colour and blend before coating
Conclusion
You need to have both steady hand skills and quality materials to achieve the best epoxy floor installation results. This guide shows you how to create a durable and stylish floor surface that will serve you well over many years. Choosing epoxy floor coating for your garage basement or commercial warehouse represents a solid investment that gives you both long-lasting quality and beautiful outcomes.
Success with epoxy floors depends on proper surface prep work and mixing combined with even application. By doing things right you will achieve an epoxy floor that remains beautiful under heavy use.
YOU MIGHT ALSO BE INTERESTED IN