How to Install Split System Air Conditioning?
Understanding Split System Components
Installing an air conditioning system gets more enticing. Due to their effectiveness and adaptability, split-system air conditioners have become a choice. Before the procedure of how to install split system air conditioning, you must understand split system components to plan everything safely.
Indoor Unit:
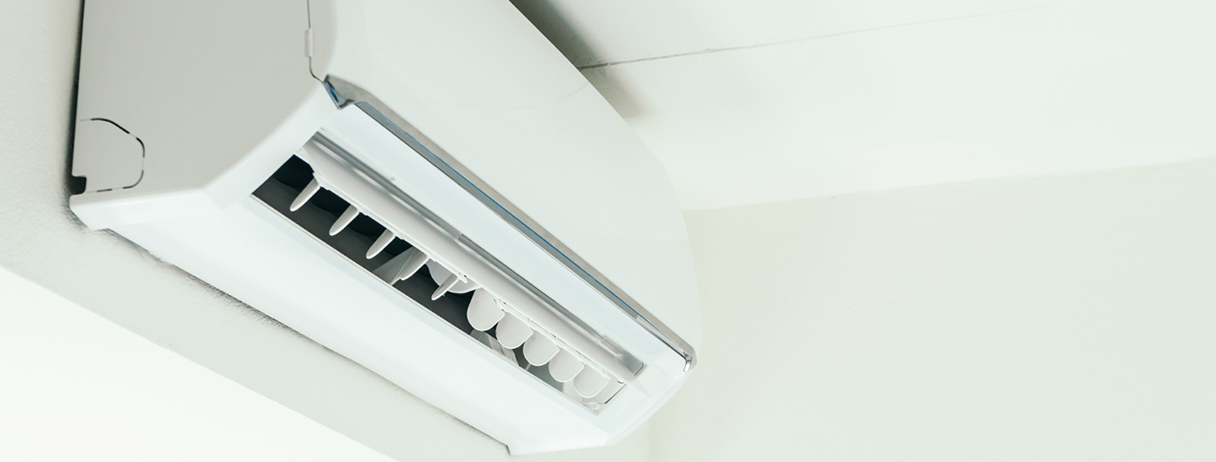
The interior unit of your split system air conditioner is its central component. It is usually fixed on an interior wall, which makes it a covert yet efficient cooling option. If you are looking for how to install a split system air conditioner on an internal wall, let's go over the main parts and characteristics of the indoor unit before you begin the installation process. Indoor unit parts and their features are:
- Evaporator Coil: This coil is responsible for removing heat from the inside air.
- Blower Fan: This device moves the cooled air around the space.
- Air filter: Filters ensure that the air you breathe is clean by capturing dust and allergens.
- Thermostat: Manages the system's temperature settings.
- Remote Control: You can change settings with a remote control while lounging on your couch.
Tips For Selecting The Best Location Inside The House
Selecting the ideal location for your indoor unit is essential for maximum efficiency.
- Steer Free from Direct Sunlight: Place the unit away from direct sunlight to avoid overtaxing the system.
- Unobstructed Airflow: To ensure effective cooling, make sure no obstructions are obstructing the airflow.
- Noise Consideration: Be mindful of the indoor unit's decibel level and avoid positioning it in locations where quiet is vital.
Outdoor Unit:
The unsung hero of your split system air conditioner is the outside unit. It is essential for releasing the heat that is taken in from within your house. Let's examine its parts and things to think about while selecting an installation location.
- Compressor: The outdoor unit compressor is responsible for pumping refrigerant between the indoor and outside units.
- Condenser coil: Discharges heat into the exterior air from the home.
- Fan: Helps to release heat.
Factors To Consider When Choosing An Outdoor Installation Spot
- Ventilation: For effective heat dissipation, make sure the area surrounding the outside unit has enough ventilation.
- Level Ground: To reduce noise and vibrations, place the device on a level, sturdy surface.
- Minimal Obstructions: For best results, keep the space surrounding the unit clear of clutter and impediments.
Safety Precautions and Compliance
The most important thing to consider when installing a split system air conditioner is safety. Let's discuss potential risks, how to prevent them, and the necessary safety equipment and measures.
Possible Risks and How to Prevent Them
Always seek expert advice if you run into problems or are unsure of yourself.
- Electrical Risks: Before handling any electrical parts, make sure the power is off. Seek the advice of an electrician if unsure.
- Exposure to refrigerants: Inhaling refrigerants can be dangerous. Observe the correct protocols for handling and discarding refrigerants.
- Physical Injury: To prevent cuts and abrasions, use the proper safety equipment, such as gloves and safety glasses.
Safety Equipment and Measures
- Gloves: Put on gloves to shield your hands from potentially harmful sharp edges.
- Safety Glasses: Wear safety glasses to shield your eyes from dust and debris.
- Operate in Pairs: Having a helper can increase productivity and safety.
- Comply with the manufacturer's guidelines: Follow the manufacturer's instructions for installation and security.
Things You May Need For Installation Work
- Wrenches
- Cable clamps
- Pencil
- Plastic anchors
- Tapping screws
- Keyhole saw
- Vacuum pump
- Stud finder
- Level
- Electrical tape
- Expanding polyurethane foam
- Drill with hole-cutting attachment
How to Install Split System Air Conditioning?
As the name says- “split system”, the unit is divided into two units- one outdoor and one indoor. Begin with installing an indoor AC unit.
Part I: Indoor Unit Installation
Step 1: Choose An Unobstructed Location
Find a place for installation generally at 6-7 feet height from the ground. Also, there should be a gap between the AC unit and the roof. You can choose your place, focusing on the location of vents and air ducts, ceiling, sunlight, and load-bearing walls. Using the details evaluated during the inspection, you can safely install the mounting system on your indoor wall. This is basically to hold your split AC unit.
Step 2: The Drilling
Once the mounting system is installed properly, the next thing is to make a hole in the wall. You have to carve the holes so accurately that they connect the outdoor unit to the indoor one perfectly. Precisely, you need to set the following:
- Electric wire network between the outside and inside
- Drainage lines to pass dripping water
- Tubes that provide cold air from the outside condenser to the inside unit.
Step 3: Running Of Wires
Connect all the important wiring and piping through carved holes. You can further tie them up with electrical tapes & finish the wiring by placing them in protective PVC tubing. This is why most aircon installers like to install indoor systems on the outside walls. By reducing the distance between both units, the installation ultimately speeds up & brings the cost of installation down.
However, the least distance between both units does not always work well. Just in case, if the indoor unit is already placed on an inside wall- then running electric wires is the only option.
Step 4: Secure The Indoor Unit To Your Wall
Once the mounting bracket is fixed properly, it is time to place the indoor split AC unit. Think as if you are installing the most fragile thing ever. Secure it strongly! However, all it takes is a very strong push to lock up the inside unit into the best position. Once the system is placed, you have to link the wiring and pipes from the third step to the backside of your inside unit.
Part II: Outdoor Unit Installation
Installing the outdoor unit of a split AC system is a task that should be carried out with care and attention to detail. Here are five steps to guide you through the installation process:
1. Select the Installation Location:
- Choose an appropriate location for the outdoor unit. It should be placed on a stable, level surface that can support its weight.
- Ensure there is ample clearance around the unit for proper airflow and maintenance access. Check the manufacturer's recommendations for specific clearance requirements.
- Position the unit away from obstructions like tall plants, walls, or other obstacles that could impede airflow or hinder its performance.
2. Secure the Outdoor Unit:
- Use mounting brackets or a concrete pad to secure the outdoor unit in place. Make sure it's level and securely anchored to prevent vibration and noise during operation.
- Ensure that the unit is positioned such that the refrigerant lines and electrical wiring can be easily connected to it.
3. Connect Refrigerant Lines:
- Carefully connect the refrigerant lines (usually copper tubing) from the indoor evaporator unit to the outdoor condenser unit. These lines carry the refrigerant that cools the air.
- Use appropriate flare or compression fittings to make leak-proof connections.
- Insulate the refrigerant lines to prevent heat exchange with the surrounding environment and condensation.
4. Connect Electrical Wiring:
- Connect the electrical wiring from the indoor unit to the outdoor unit according to the manufacturer's wiring diagram and local electrical codes.
- Ensure that the power supply to the outdoor unit is properly grounded and meets electrical safety standards.
- Double-check all electrical connections for accuracy and safety.
5. Test and Commission:
- Before sealing the connections, test the system to ensure it's functioning correctly. This includes checking for any refrigerant leaks, verifying electrical connections, and confirming that the unit starts and operates as expected.
- Once the system passes the initial tests, vacuum-purge the refrigerant lines to remove air and moisture, and then charge the system with the appropriate amount of refrigerant according to the manufacturer's specifications.
- After commissioning, monitor the unit for any signs of abnormal operation and ensure it provides the desired cooling performance.
Part III: Final Check For Completion
- Confirm that the outdoor unit is properly grounded to prevent electrical hazards.
- Ensure that the electrical supply to the unit meets electrical codes and safety standards.
- Test the system by turning it on and off to ensure it starts and operates correctly.
- Check the settings and controls to ensure they respond as expected.
- Verify that the unit's condensate drainage system is properly connected and functioning to prevent water accumulation.
Remember that the installation process may vary slightly depending on the brand and model of the split AC system, so it's crucial to refer to the manufacturer's installation instructions and guidelines specific to your unit.
Tips For Split System Air Conditioning Owners
- To maximise energy efficiency, it's crucial to select the appropriate size of the air conditioner that suits your home's needs.
- Regularly inspect and clean the outdoor condenser from debris, and ensure you replace the air conditioner filter every 3 months or as recommended.
- For a versatile cooling and heating solution, consider opting for a split system heat pump or mini-split, as they function both as air conditioners and heaters.
- Ensure there is a dedicated power outlet for your air conditioner to avoid overloading circuits and maintain efficient operation.
- Always adhere to the manufacturer's instructions provided with your split system air conditioner to guarantee proper installation and usage.
Conclusion
Installing a split system air conditioning unit can greatly enhance your indoor comfort and overall living experience. By following the step-by-step guide and seeking professional assistance if needed, you can ensure a successful installation process. Enjoy the benefits of efficient cooling and climate control in your space for years to come. Stay cool and comfortable!


YOU MIGHT ALSO BE INTERESTED IN
Capital Cities
- Air Conditioning Services Services in Melbourne
- Air Conditioning Services Services in Brisbane
- Air Conditioning Services Services in Sydney
- Air Conditioning Services Services in Adelaide
- Air Conditioning Services Services in Perth
- Air Conditioning Services Services in Canberra
- Air Conditioning Services Services in Hobart
- Air Conditioning Services Services in Darwin


